Deploying 3D Printing Tool Sets in Commercial Farms

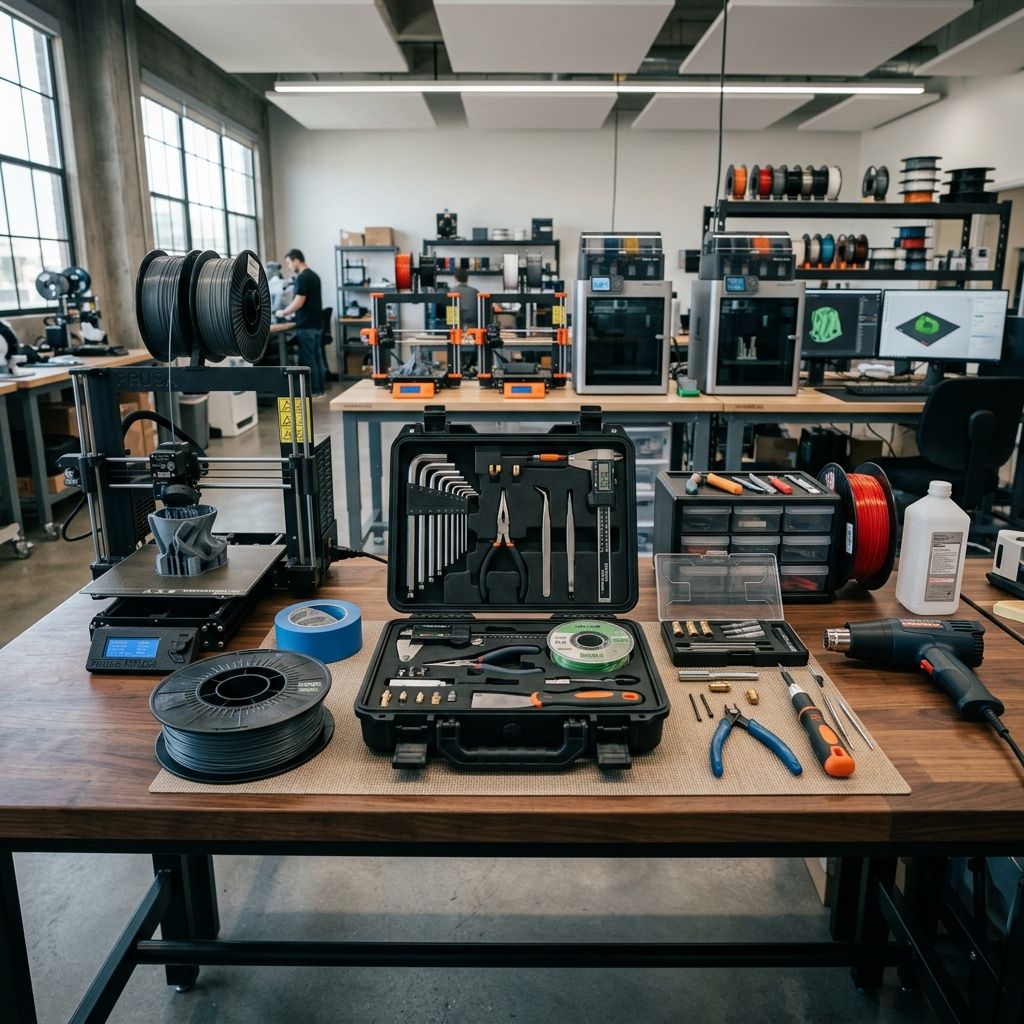
Deploying Standardized 3D Printing Tool Sets in Commercial Print Farms: Workflow Economics and Maintenance ROI
Analyzing labor efficiency gains, metallurgy limitations, and preventive maintenance protocols across multi-machine additive production cells.
Business Impact & Maintenance Economics
In commercial additive manufacturing facilities operating 20 to 100 printers, labor and machine downtime represent up to 42% of total operational expenditure (OpEx). Deploying dedicated, standardized hardware kits—such as the Anycubic Tool Set or customized cell-side maintenance trays—directly at each printing station eliminates technician transit time and tool searching. Standardizing nozzle change spanners, flush cutters, hardened hex drivers, and deburring blades recovers an average of 12 minutes per servicing event. Across a 20-machine fleet with weekly preventative cycles, this simple workplace 5S standardization saves over 190 hours of technician labor annually. Use our Cost Calculator alongside our 3D Printer Troubleshooting tool to quantify downtime reduction and optimize parts-per-hour output.
The Economics of Cell-Side Tooling in Additive Manufacturing
Small-to-medium manufacturing enterprises (SMEs) scaling their 3D printing operations from a prototyping lab to a revenue-generating print farm often stumble over labor bottlenecks rather than machine speed. The natural inclination during farm expansion is to centralize hand tools in a shared rolling tool chest. On paper, this avoids purchasing duplicate equipment. On the shop floor, it introduces continuous friction.
When an operator discovers a clogged 0.4 mm hardened steel nozzle on Machine 14, walking 25 meters across the floor to locate an 8 mm socket wrench, finding it missing, borrowing a non-ratcheting combination spanner from another bench, and walking back wastes 15 to 20 minutes. Multiplied across multiple shifts, unorganized maintenance routines depress Overall Equipment Effectiveness (OEE). Equipping every workstation or cluster with a dedicated, self-contained toolkit—like the Anycubic Tool Set—transforms unscheduled stoppages into standardized, rapid pit stops.
- Workplace 5S Compliance: Providing dedicated cell tooling enforces 'A place for everything and everything in its place', cutting tool retrieval time from 8.5 minutes down to under 15 seconds.
- Cross-Contamination Prevention: Eliminates the hazardous practice of using greasy CNC machine wrenches or resin-tainted tweezers on clean thermoplastic filament extruders.
- Fast Triage Capability: Empowers machine operators to clear filament feed tangles and bed adhesion snags immediately without calling a senior maintenance technician.
- Low Capital Cost: Turnkey additive kits cost under $25 per workstation, offering immediate capital payback within the first three maintenance interventions.
Inventory and Metallurgy: What Actually Ships in Entry-Level Tool Kits
Commercial operators must evaluate bundled toolkits with an engineering eye. Budget tool packages shipped with desktop printers provide functional essentials, but their metallurgical limits dictate what tasks they should handle and where industrial upgrades are mandatory.
The standard Anycubic Tool Set typically includes an array of ball-end and straight L-shaped hex wrenches (1.5 mm, 2.0 mm, 2.5 mm, 3.0 mm), a pair of miniature flush cutters (shear wire cutters), a spring-steel bed scraper with a beveled blade, needle-nose tweezers, a nozzle cleaning drill or acupuncture needle set, and a stamped sheet-metal multifunction open-end wrench.
The stamped steel wrenches are adequate for occasional bed leveling wheel adjustments on budget Cartesian machines, but they fail quickly under the torque required to tighten hotends at 285°C. Stamped steel lacks the structural stiffness of chrome-vanadium (Cr-V) alloy; under 2.5 N·m of tightening torque, stamped jaws yield and round off brass nozzle flats. Similarly, the included flush cutters feature high-carbon steel blades induction-hardened to approximately 52 to 55 HRC. They slice neatly through PLA, PETG, and nylon filament tails, but cutting music-wire bed springs or steel support wire will permanently notch their cutting edges.
Field Physics & Calculation: Technician Labor ROI and Cam-Out Torque
To justify capital allocation for equipping 20 additive manufacturing stations with dedicated toolsets and premium driver upgrades, you must quantify downtime economics alongside fastener failure physics.
Consider an additive job shop operating 20 production printers running 16 hours per day, 250 days per year (80,000 operational hours fleet-wide). Maintenance logs show an average of 4 minor maintenance events per machine per month (960 events annually), comprising nozzle swaps, bed realignments, and extruder jam clearances.
The operational metrics are defined as:
- LR = Fully burdened technician labor rate = $45.00/hour
- OC = Machine lost-revenue opportunity cost = $28.00/hour
- tcentral = Average service duration using a centralized shared toolbox = 18 minutes (0.30 hours)
- tdedicated = Average service duration using a dedicated cell-side tool set = 6 minutes (0.10 hours)
- Nevents = Total annual servicing events across fleet = 20 × 4 × 12 = 960 events
The labor and machine downtime savings per servicing event are:
Δt = tcentral - tdedicated = 0.30 hr - 0.10 hr = 0.20 hours (12 minutes saved per event).
The total annual financial recovery (ΔCost) is calculated as:
ΔCost = Nevents × Δt × (LR + OC)
ΔCost = 960 × 0.20 × ($45.00 + $28.00) = 192 × $73.00 = $14,016.00 per year.
Equipping 20 machines with dedicated toolsets at $25 per kit represents an initial capital investment of only $500.00. The payback period is calculated as:
Payback Period = ($500 / $14,016) × 12 months = 0.43 months (less than 14 operating days).
Next, consider the mechanics of stripped fastener heads during extruder disassembly. M3 socket-head cap screws (SHCS) securing stepper motor brackets feature a 2.5 mm hex socket. The maximum torsional shear stress τ before fastener socket strip is governed by:
τ = (16 × T) / (π × d3)
Where T is applied torque and d is the inscribed hex diameter (2.5 mm). An operator using a worn or undersized loose hex key engages only the outer 15% of the corner flats. If the tool tolerance is loose (Δs = 0.08 mm clearance slop), the contact angle shifts from pure shear to an inclined cam-out force. At T = 2.4 N·m, the local compressive stress exceeds the 450 MPa yield strength of grade 8.8 fastener steel, stripping the socket round. Recovering a stripped screw with an extractor bit adds 35 minutes of unscheduled bench downtime ($42.58 in wasted labor and machine stall). This demonstrates why tool tolerance control directly protects profit margins.
Tool Specification & Metallurgy Comparison
The matrix below evaluates common tool elements found in entry-level packages against professional shop-floor standards:
| Tool Component | Standard Kit Metallurgy | Industrial Farm Standard | Hardness (HRC) | Primary Failure Mode | Recommended Replacement Cycle |
|---|---|---|---|---|---|
| Flush Cutters | High Carbon Steel (SK-5) | Cr-V with Ground Bevel | 52 - 55 HRC | Blade notch / Jaw misalignment | 6 Months (or after wire cut) |
| Hex L-Keys (1.5-3mm) | Cold-Rolled Carbon Steel | S2 Shock-Resistant Steel | 58 - 62 HRC | Ball-end shear / Corner rounding | 12 Months (High-torque use) |
| Bed Scraper | Stamped Spring Steel | Flexible 301 Stainless | 45 - 48 HRC | Edge burring / PEI sheet gouging | Permanent (Hone edge monthly) |
| Nozzle Spanner | Stamped Low-Carbon Sheet | Forged 6-Point Socket | < 40 HRC | Jaw widening / Nut rounding | Immediate Upgrade |
| Cleaning Needles | 304 Austenitic Stainless Wire | Tungsten Micro-Drills | Spring Temper | Kinking / Snapping inside orifice | Consumable (Discard on bend) |
| Tweezers | Formed 410 Stainless Sheet | ESD Anti-Magnetic Titanium | 40 - 42 HRC | Tip bending / Loss of grip alignment | 18 Months |
Standard Operating Procedure: Hotend Servicing Protocol
To avoid damaging heater blocks and breaking fragile thermistor cartridges, train print farm technicians to follow this standardized 5-step hot-swap protocol using cell tools:
- Thermal Expansion Preheating: Heat the hotend to 285°C (or 20°C above your highest operating print temperature). Never attempt to break loose a cold nozzle; aluminum heater blocks contract tightly around brass and steel threads, causing thread stripping or shear fracture of the heatbreak tube.
- Heater Block Counter-Torque: Clamp the aluminum heater block securely with smooth-jaw parallel pliers or an insulated block-holding spanner. Never allow the heater block to rotate while applying torque to the nozzle; rotation will shear the fragile stainless-steel heatbreak neck or sever thermistor lead wires, requiring an unscheduled repair similar to procedures detailed in How to Replace Prusa MK4/S Extruder.
- Nozzle Extraction & Inspection: Use an 8 mm or 7 mm 6-point socket driver to unscrew the old nozzle. Place the hot nozzle immediately into a ceramic crucible; never let it rest on synthetic workbench mats or 3D-printed tool trays.
- Thread Cleaning & Seating: Thread the new nozzle into the block finger-tight using a heat-resistant silicone glove or socket extension. Back the nozzle out one-quarter turn, screw the heatbreak down until it butts firmly against the nozzle back face, then apply final tightening torque (typically 1.8 to 2.2 N·m for brass, 2.5 N·m for hardened steel).
- Cold-Side Verification: Allow the assembly to cool to ambient temperature. Verify that a visible 0.5 mm gap remains between the nozzle hex shoulder and the heater block face; if the shoulder rests flush against the block, the nozzle is not sealing against the heatbreak, resulting in catastrophic plastic leakage across the heater block threads.
Preventative Maintenance Routines for Farm Workhorses
Standardized toolkits also facilitate scheduled preventative maintenance (PM). Rather than waiting for catastrophic print failure, implement a weekly 15-minute PM inspection per machine:
- Extruder Drive Gear Inspection: Use the stiff nylon brush from the tool kit to clean ground plastic fines from the dual-drive hobbed gears, restoring extrusion grip.
- Linear Motion Clearing: Wipe dust and carbon debris from linear guide rails and ground rods using lint-free shop wipes, following standard cleaning protocols outlined in How to Clean Bambu Lab X1 Carbon Rods and Rails, then apply synthetic PTFE grease.
- Belt Tension Verification: Check timing belts for tooth fraying and measure harmonic frequency using a sound-frequency app to ensure resonance damping stays within calibrated limits.
- Fastener Torque Check: Systematically check the M3 frame and toolhead mounting bolts using the 2.5 mm S2 hex driver, catching loose motor mounts before vibration causes layer shifting.
By establishing rigorous maintenance schedules like those described in Preventive Maintenance for Prusa MK4 & MK4S, commercial print farms maintain 95%+ fleet uptime.
Frequently Asked Questions
Why should I avoid using stamped sheet metal wrenches for hotend nozzle changes?
Stamped wrenches have soft jaws that deform under the 2.0 N·m torque needed to seal a hotend, rounding off the brass nozzle hex flats and ruining the heater block.
What is the primary danger of using dull flush cutters on 3D printing filament?
Dull cutters crush and ovalize the filament tip instead of slicing cleanly, preventing smooth feeding through tight PTFE guide tubes and causing jams in automated material systems.
How often should nozzle cleaning acupuncture needles be replaced?
Cleaning needles are single-incident consumables; once bent or subjected to high nozzle heat, their spring temper is lost and they risk snapping off inside the precision orifice.
Can bed scrapers damage textured PEI or satin build plates?
Yes. Aggressive prying with sharp-cornered steel scrapers gouges the powder-coated PEI surface; always allow the spring steel plate to cool completely so parts release naturally via thermal contraction.
Workshop Safety and Ergonomic Warning
Always disconnect electrical mains power before performing mechanical maintenance on extruders or mainboards. Heater blocks retain lethal burn temperatures (> 250°C) for up to 15 minutes after power cutoff; always verify surface temperature with an infrared non-contact thermometer before touching metal assemblies. Never pull a stuck print toward your torso with a sharp scraper blade; always push the tool away from your hands and body, keeping your non-dominant hand entirely clear of the tool travel vector.
Related Intel
How to Choose a 3D Printing Tool Kit: MatterHackers Review
Selecting a dedicated 3D printing toolkit like MatterHackers comes down to metallurgy, nozzle service clearance, and deburring quality. Here is our field assessment of durability and workshop ROI.
Anycubic Tool Set: Real Print Farm Review
The Anycubic Tool Set can reduce hotend disassembly time from 35 to 12 minutes, but the included pliers and wrench have durability issues. The needle cleaners and silicone sock remover are excellent. For a $25-$35 kit it pays for itself in four nozzle swaps.
Anycubic Tool Kit: Buying Guide for Makers
Anycubic Tool Kit: decent entry-level set with essential tools. Weak points: hex driver handles wear out, needles too soft. Brass brush is standout. Worth it for hobbyists, not for heavy daily use.